
Making a Schlieren imaging machine
In 2017 I collaborated with scientists at Nokia Bell Labs to use their Schlieren imaging machinery to make the works 6 Litres and Kiss. Schlieren imaging commonly used in fluid dynamics, as it can show hidden air currents on a television monitor that would usually be invisible to the naked eye. I worked with Nokia Bell Labs to produce videos that showed the body heat and breath coming from two people.The optic system is incredibly interesting and fun to work with, as it acts as a widnow into annother layer of reality where you can actually see air.
I wanted to give audience members this experience also, by having a Schlieren system set up live in a gallery space, so they would be able to see their own breath and body heat live. A ready made Schlieren optic system is extreemly expensive, so I decided to make my own. The main component of a Schlieren system is a spherical mirror. The reason the optic system is so expensive is beacuse of this spherical mirror. This was the component that I would have to make myself. Luckily spherical mirrors are primarily used for two things 1. Schlieren optic systems and 2. Telescopes. The online DIY telescope community was able to provide ample resources to instuct me on how to grind my own spherical mirror.
This research contriubited to the work Weather Fronts
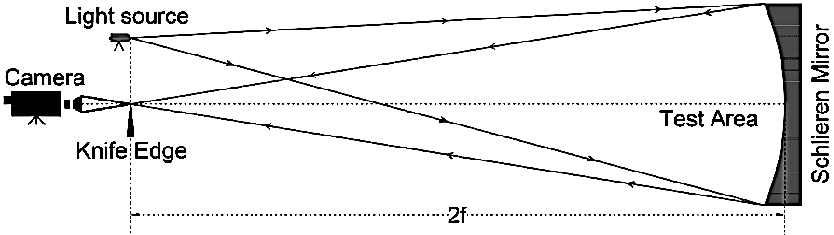
How does a Schlieren system work ? Schlieren photography is similar to the shadowgraph technique and relies on the the fact that light rays are bent whenever they encounter changes in density of a fluid. By concentrating a cone of light down to a pin point with the Spherical mirror a camera is able to reccieve this pin point of light that is so small that it amplyfies any visual changes in the air density.
To begin I ordered a 6’’ mirror blank (a cylinder of borosilicate glass) and various sizes of polishing grits. The sides of the mirror blank needed to bebeveled to reduce the risk of them chipping later on in the grinding process. I beveled the edges with a carborundum stone.


I made a tile tool to do the rough and fine grinding of the mirror. This tool was made by making a plaster disk, then waterproofing it with epoxy and then glueing an asymetrical grid of ceramic tiles upon it.

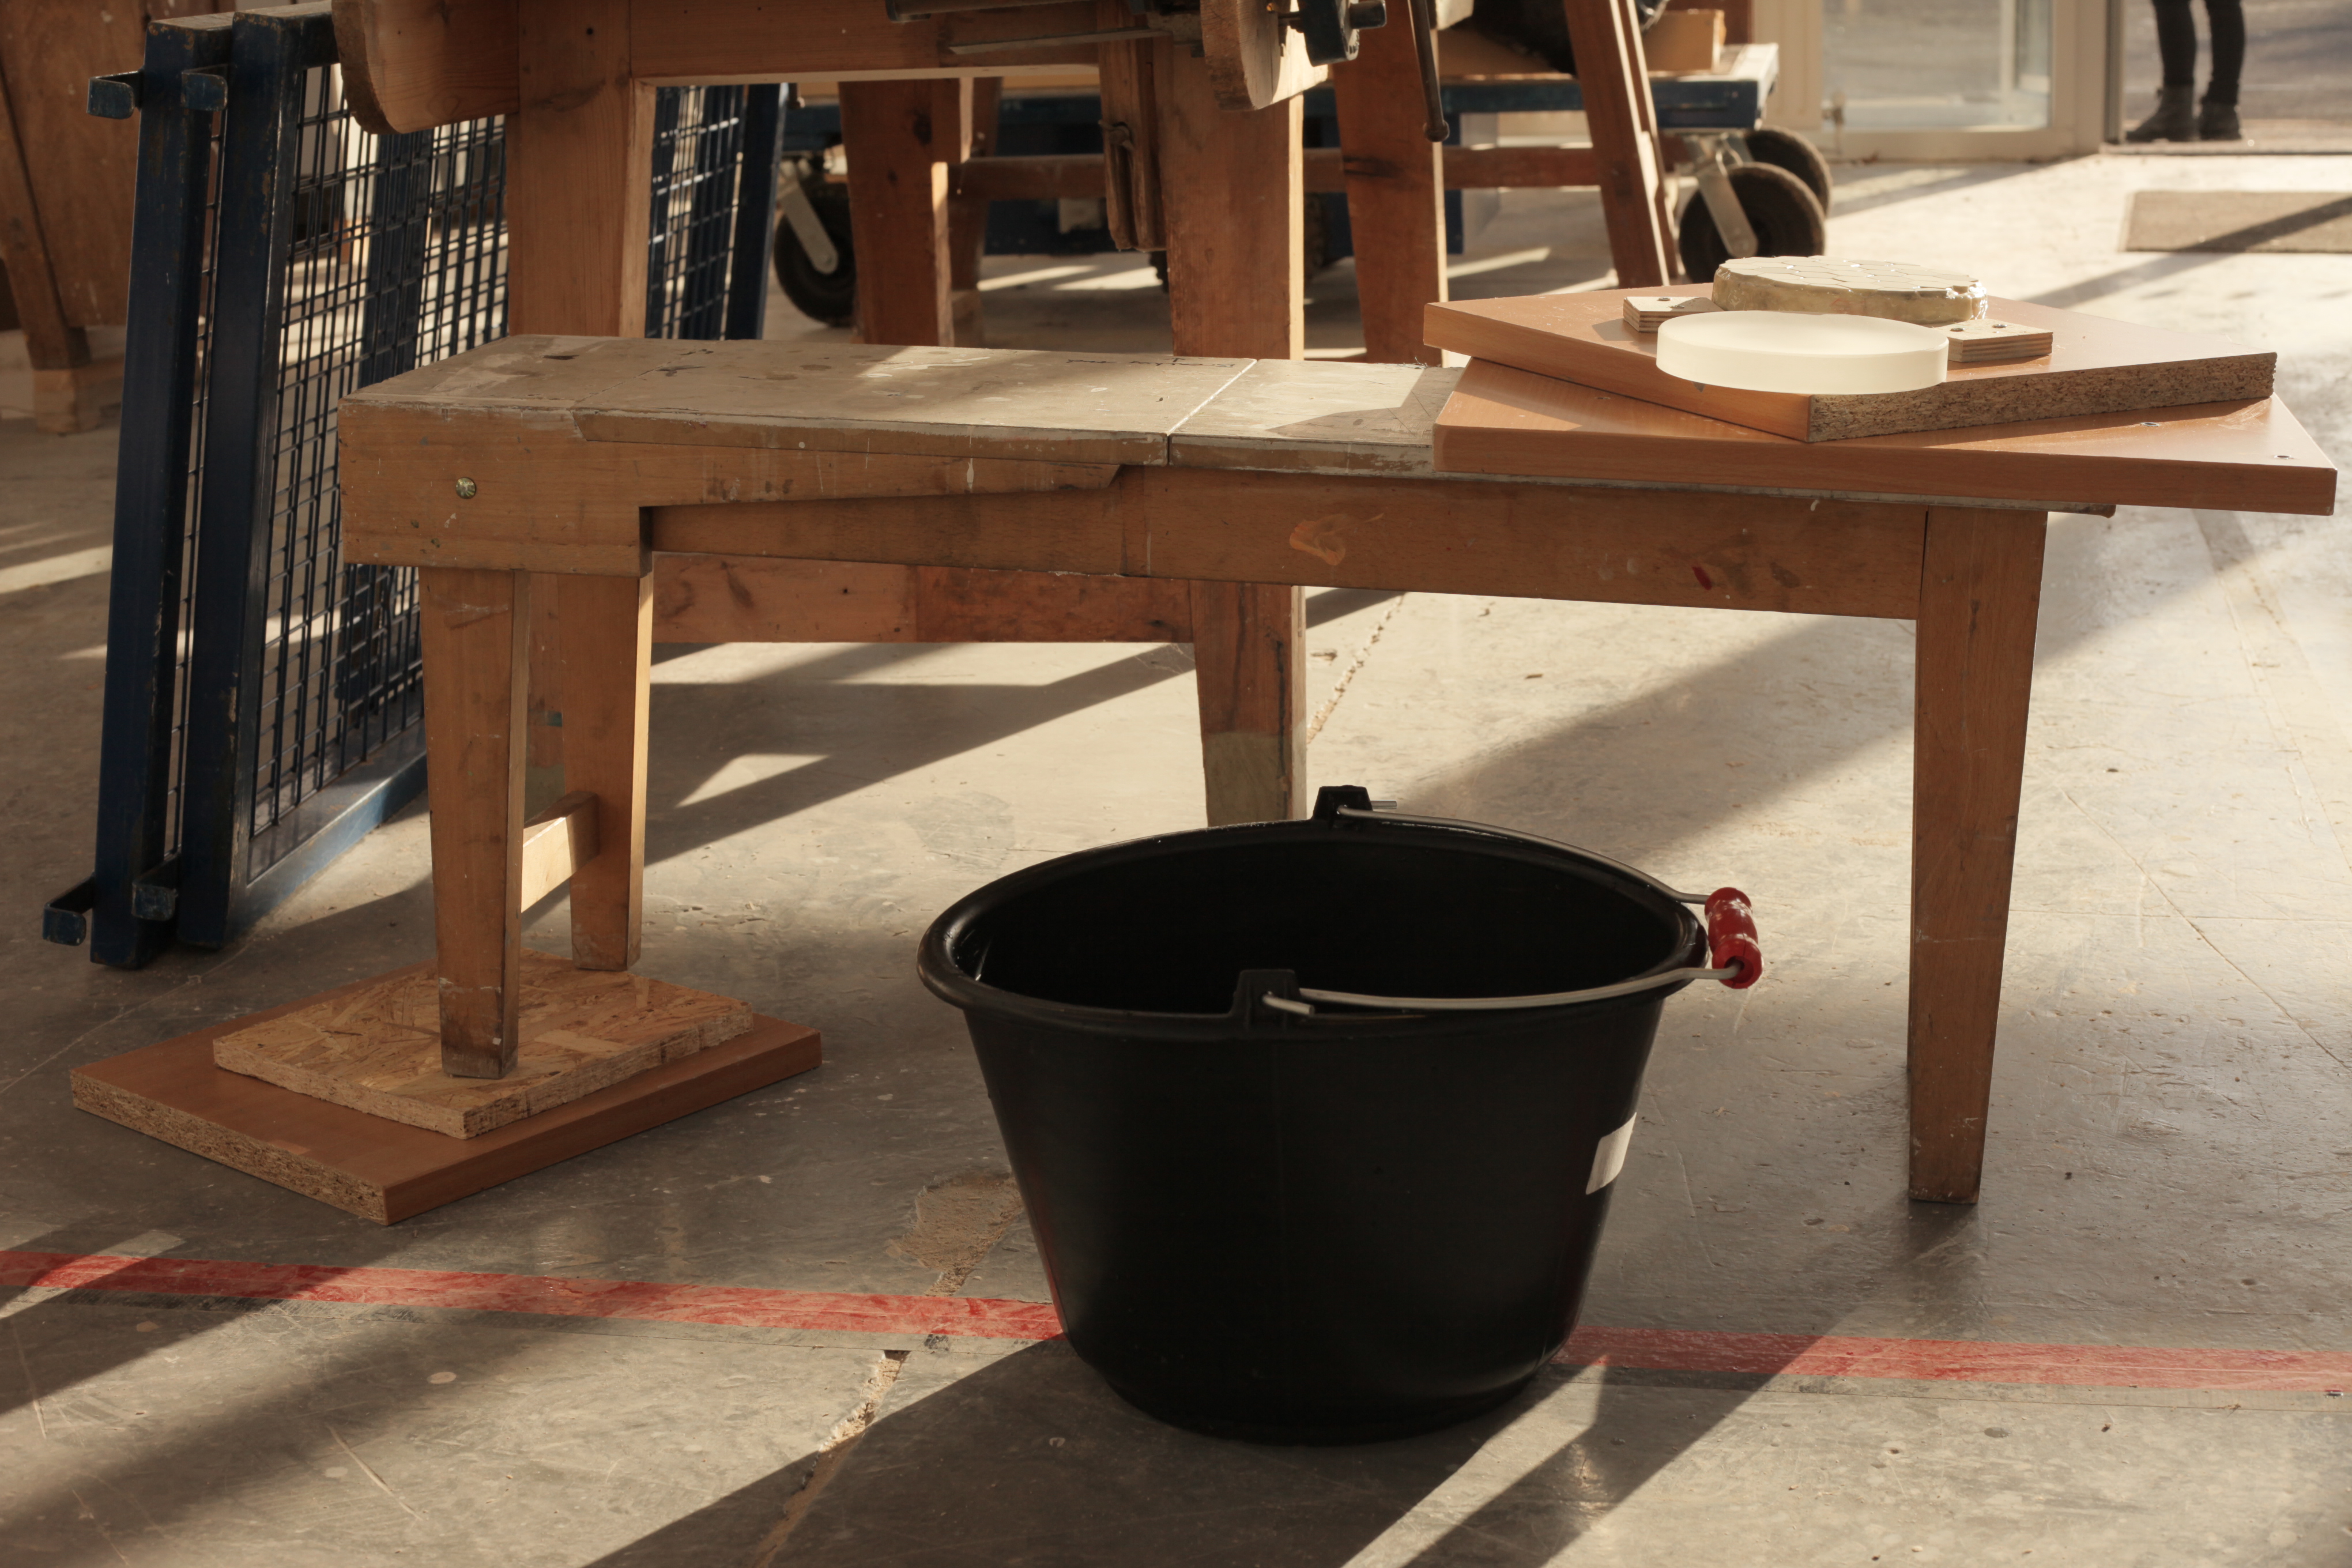
The tile tool is used with a decreasing scale of grits. Griding is started with a coarse grit and then as one grit gets ground out it is substituted with a finer one. The coarse grits are made from Silicon Carbide and the finer grits are made from Aluminum Oxide. I constructed a grinding bench that I used to rest the mirror and tool while I was working them. The bucket is to wash the mirror after every 10 Wets. A Wet: A wet is whhen you apply grit to the mirror ,spray it with water and grind that grit out. You repeat this process 10 times before washing the mirror and tile tool.
Tile tool and mirror ontop of the constructed turntable.

To grind the mirror in a predicable way to achieve a spherical surface I needed to use a variety of grinding stokes. The main strokes I used was the Normal stroke and the Chordal Stroke. The Chordal stroke was used to initially remove a large quantiy of glass,a process known as ‘hogging out’. After the mirror was around the correct depth I began using the normal stroke to perfect the spherical surface.
During coarse and fine gridning I was attempting to 1. Reach my target stagitta and 2.Smooth out the surface. The stagitta is the depth of the mirror’s curve.

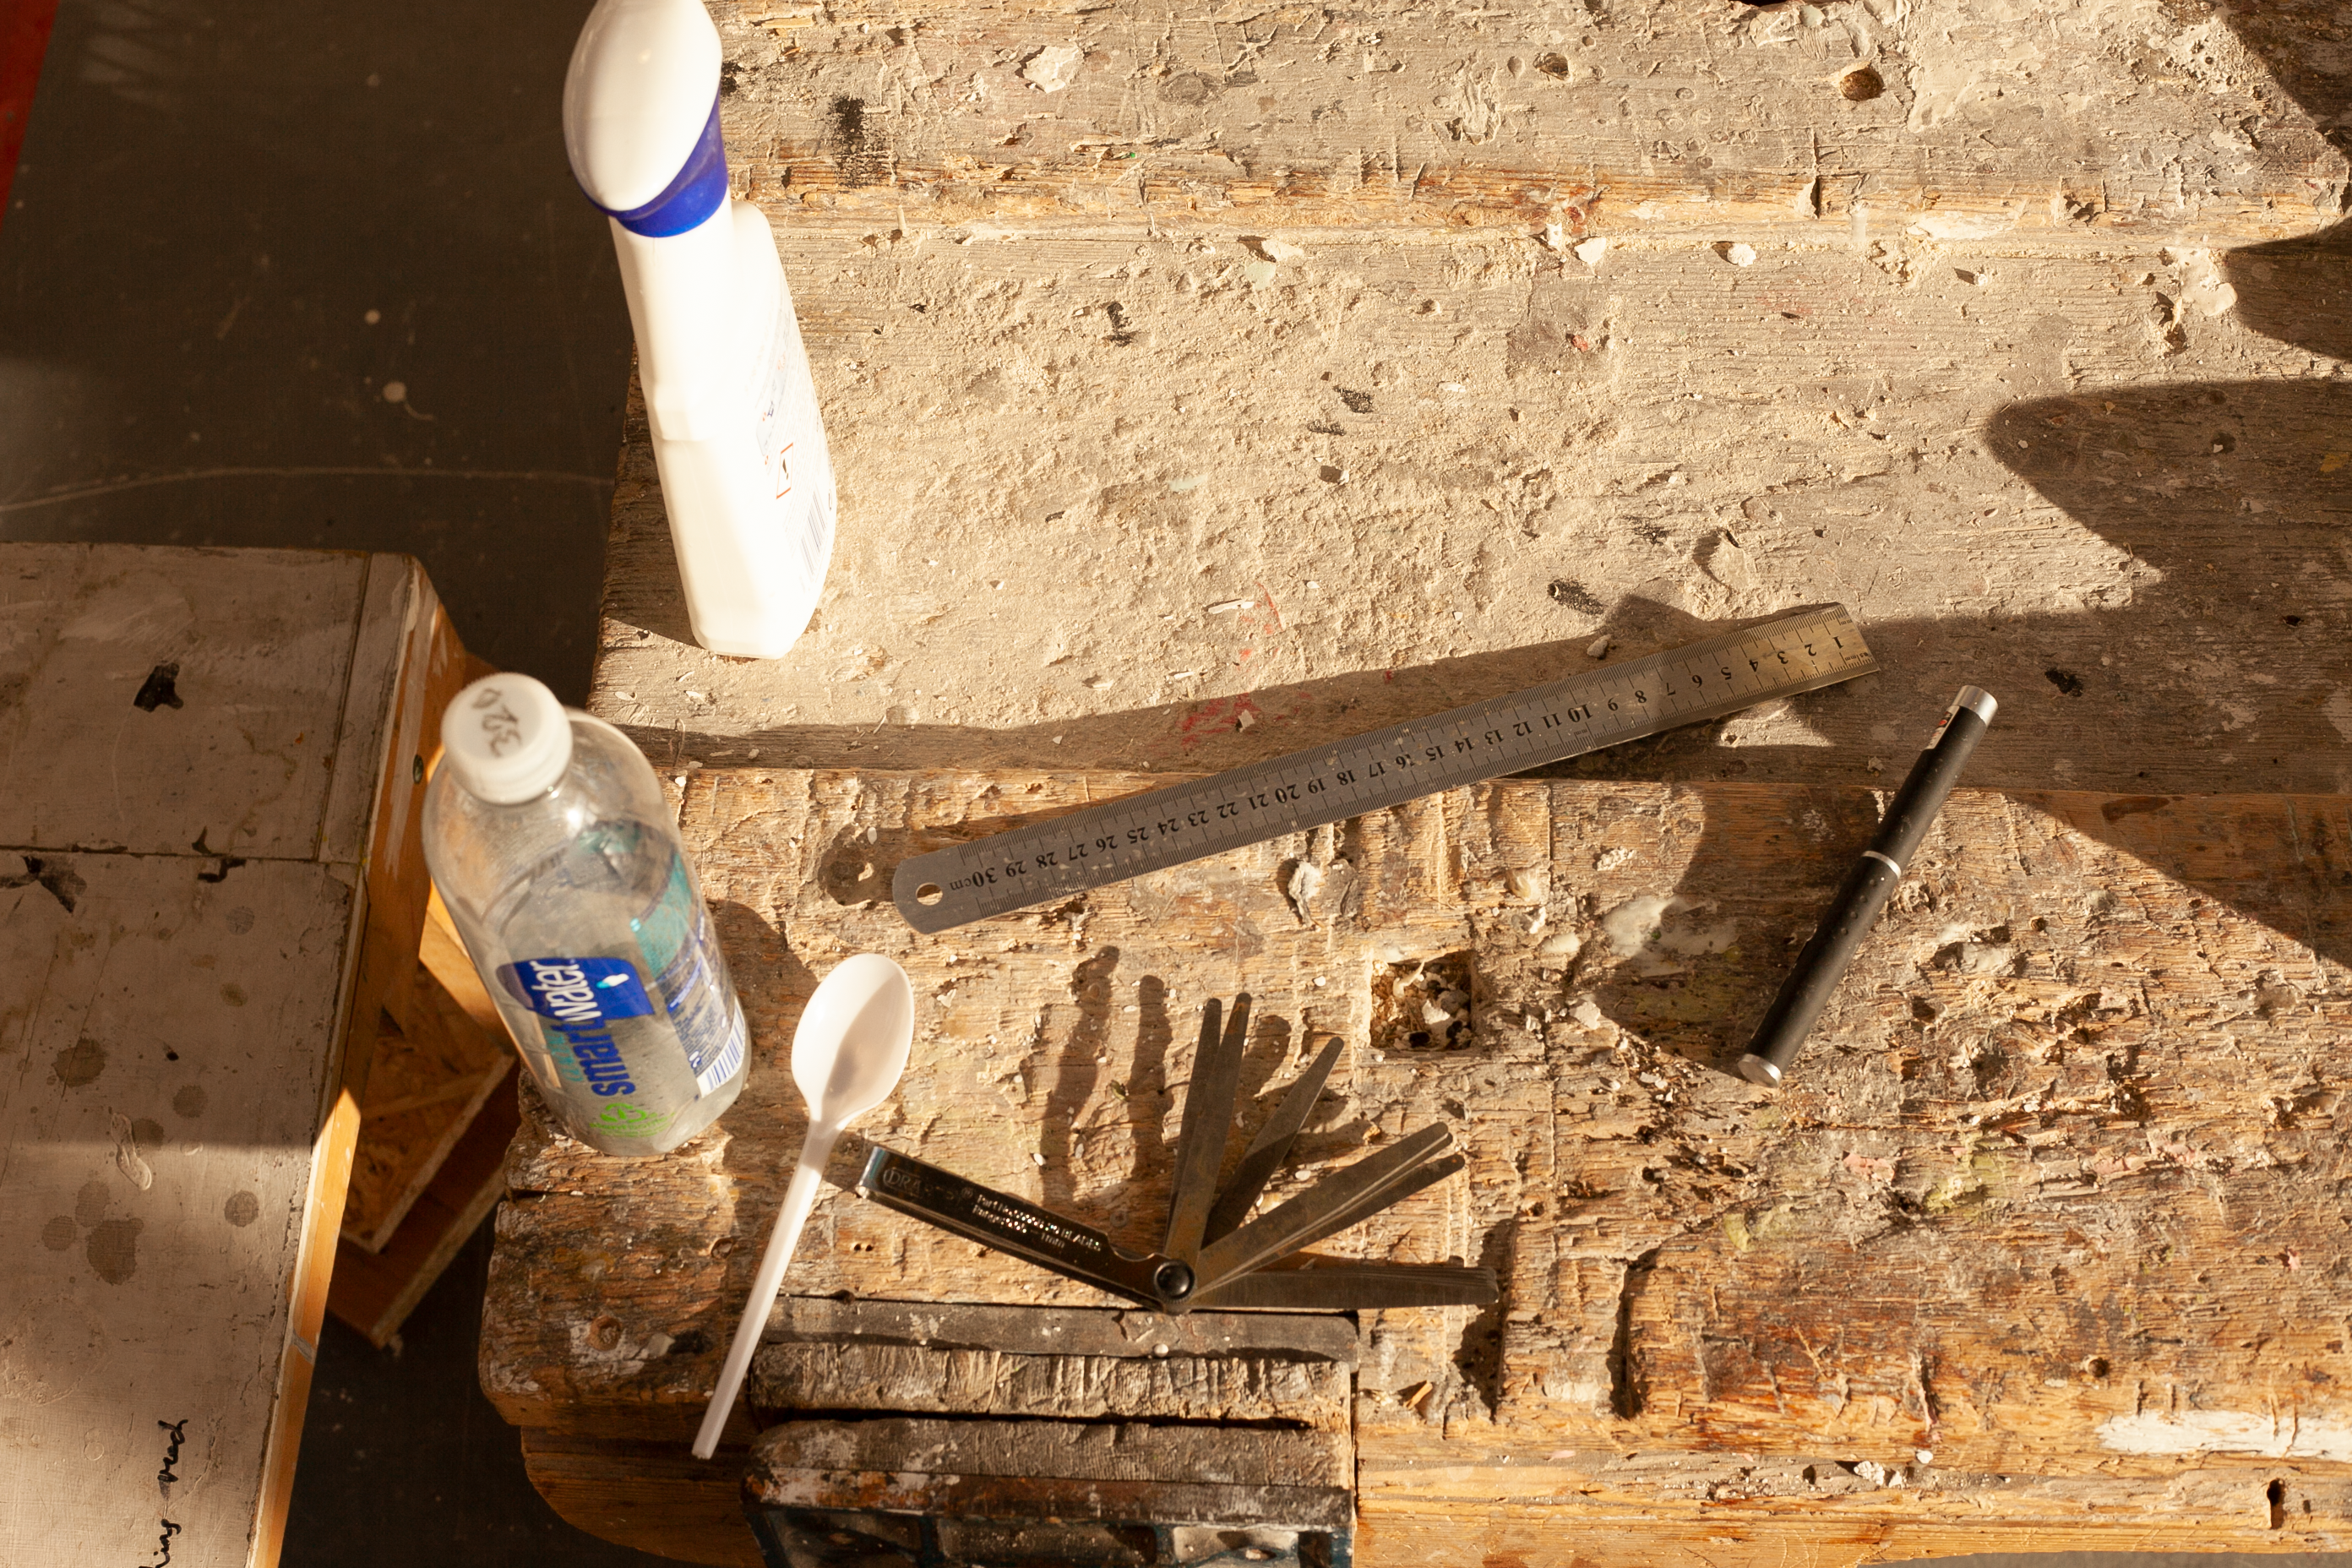
The stagitta I achieved was 0.78mm, this gives me a focal length of 3.78m Normally for telescopes you want a focal length of 1.5m beacuse the bigger the focal length the larger the telescope body you will have to make to make, but in my case a longer focal length produces a better Schlieren effect. Here are some of the tools I used, Pictured : Bottle with 130 micron Silicon Carbide, spray bottle,steel ruler and depth guage to mesure the stagitta and laser to check for inconsistencies in the smoothness of the mirror.
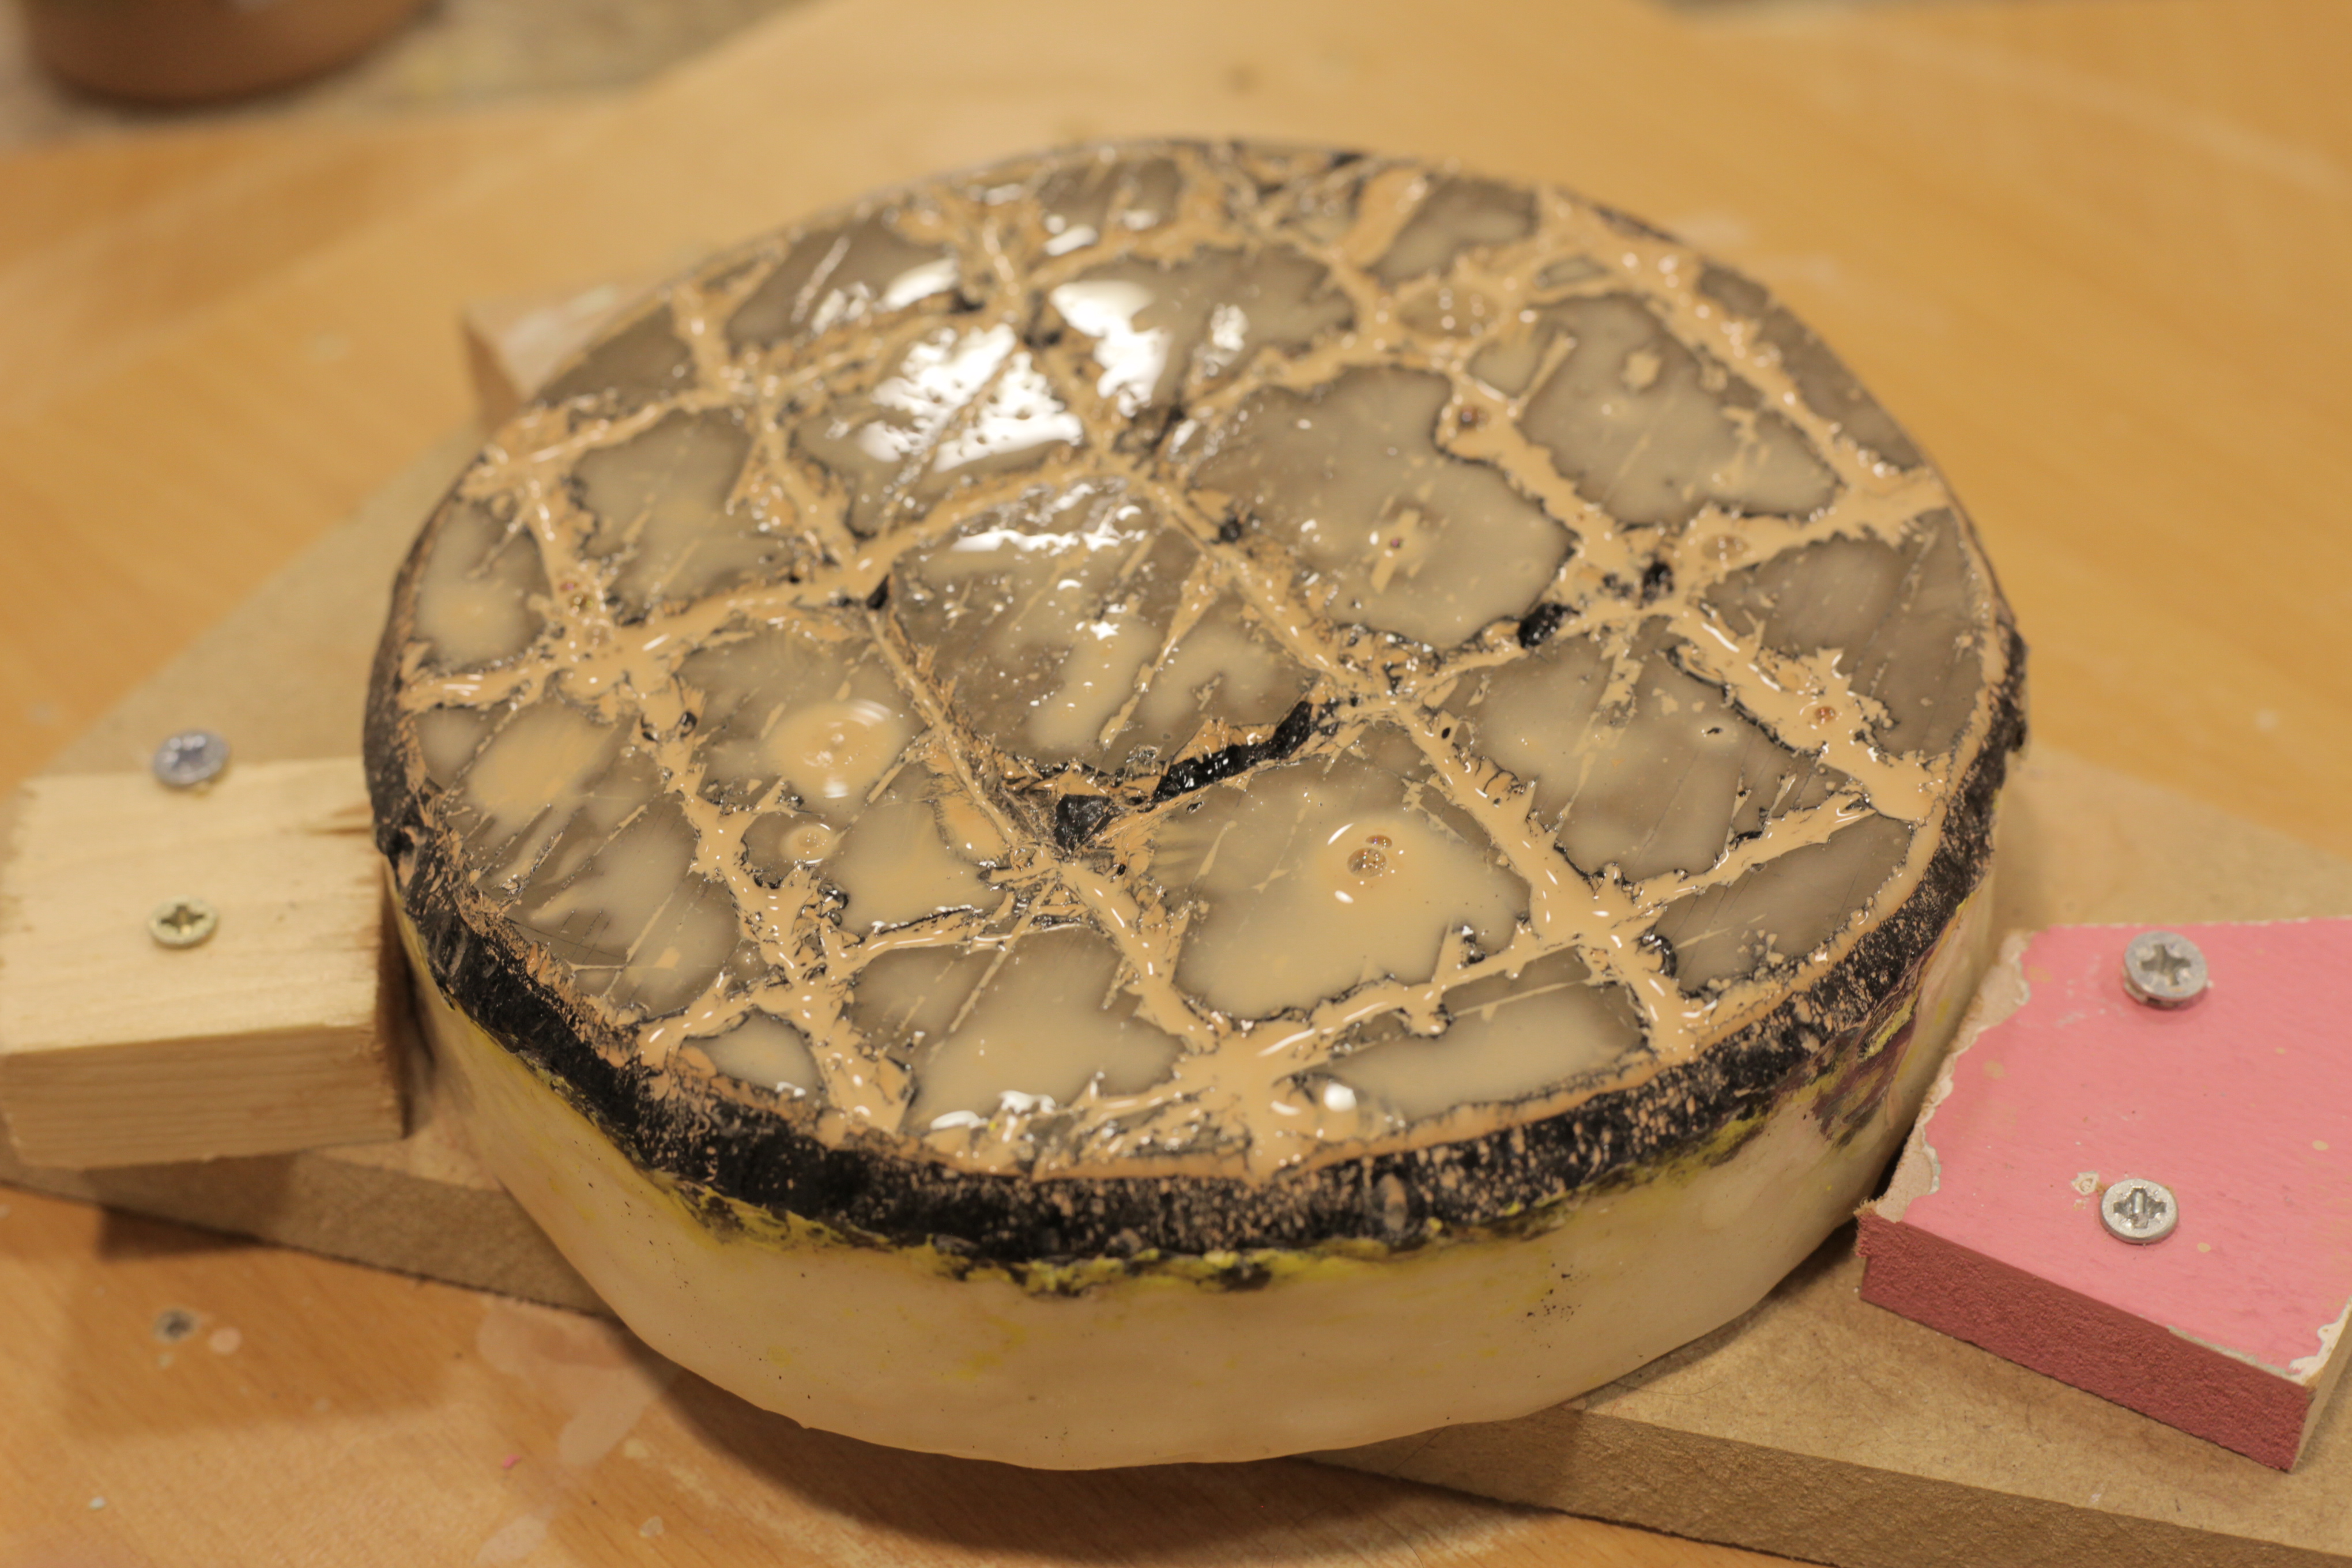
When I finnished fine grinding I continued onto polishing. Polishing is what Ameture Telescope Makers (ATMs) call the true art of mirror making. To polish the mirror one needs to make a pitch lap. A pitch lap is made from a plaster disc with pitch ontop and is used with Cerium Oxide to achieve a perfect spherical surafce on the mirror. This is the process I went through to make the pitch lap.
1. Melt the pitch 2. Create a dam around a plaster disc 3. Pour pitch 4. Imprint mirror onto soft pitch 5. Bevel sides of pitch lap.


Polishing was the most meditive/grueling part of the process. To achieve a perfect surface on the mirror 14 hours of polishing needed to be put in (This was after 10 hours of rough and fine grinding). The orange abrasive used in polishing the mirror is called Cerium Oxide, each particle of Cerium Oxide is 3.5 microns thick. For perspective a human hair is 50 microns thick !

Once the 24 hours of total grinding.I needed to test the mirror’s accuracy. To do this I needed to build a Fouccault tester. Here are the plans for the tester which I found on www.stellafane.org. This project would not have been possible with out the information from the Stellafane website and the advice from their webmaster Ken Slater.
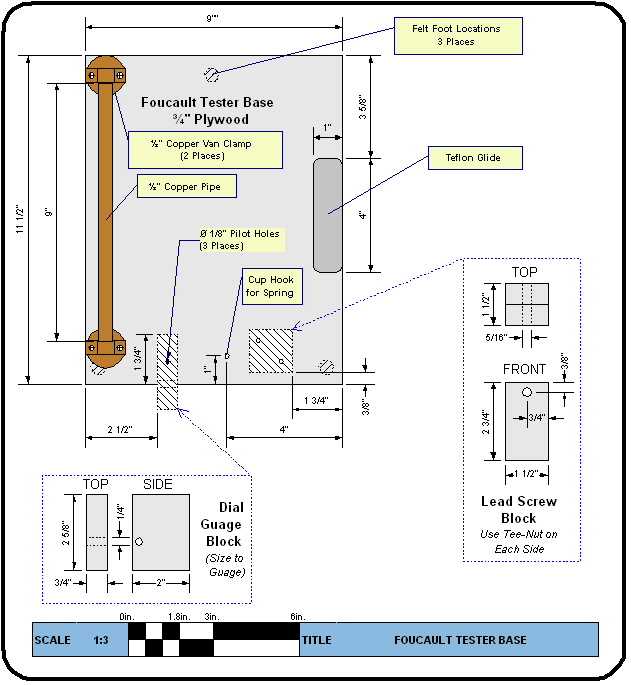
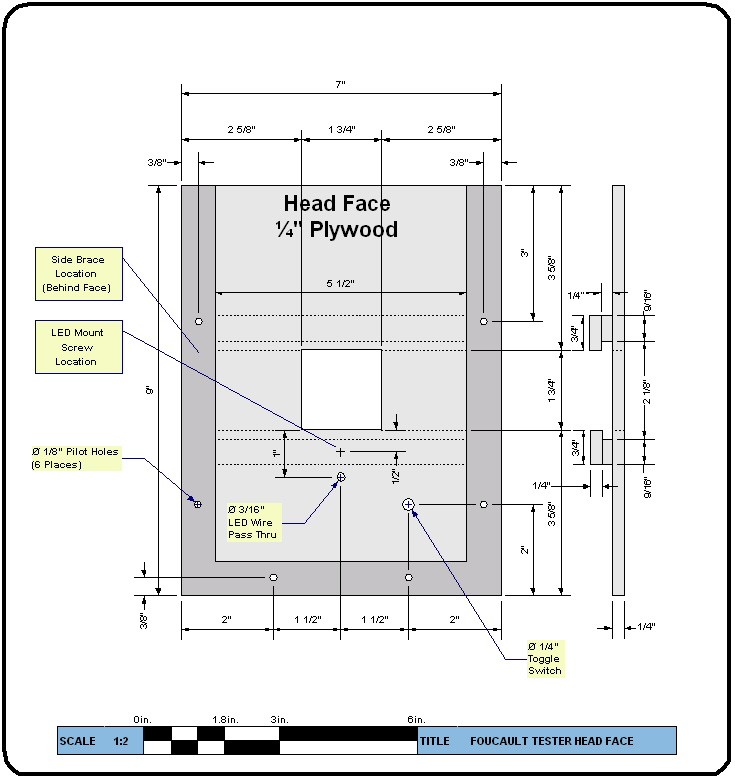

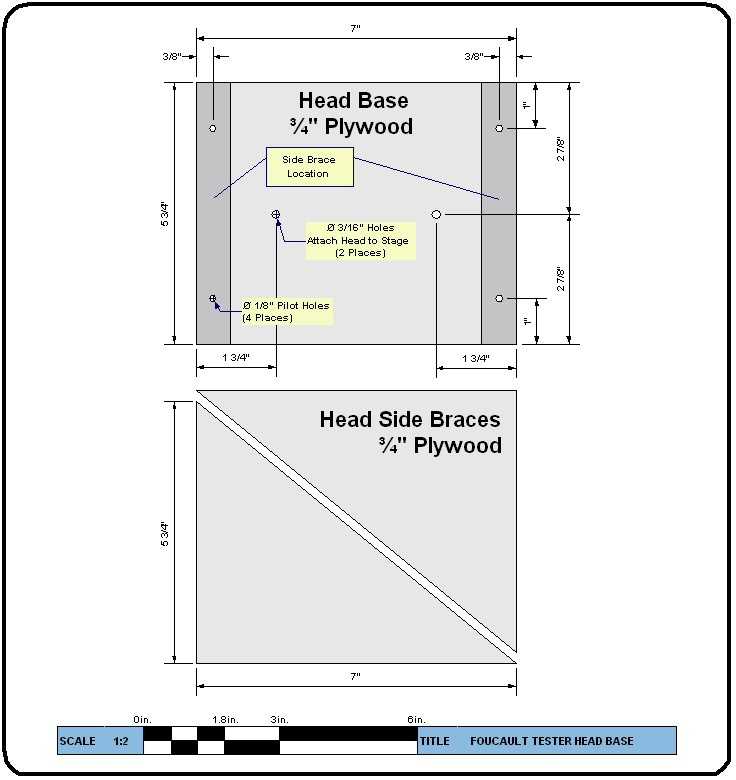
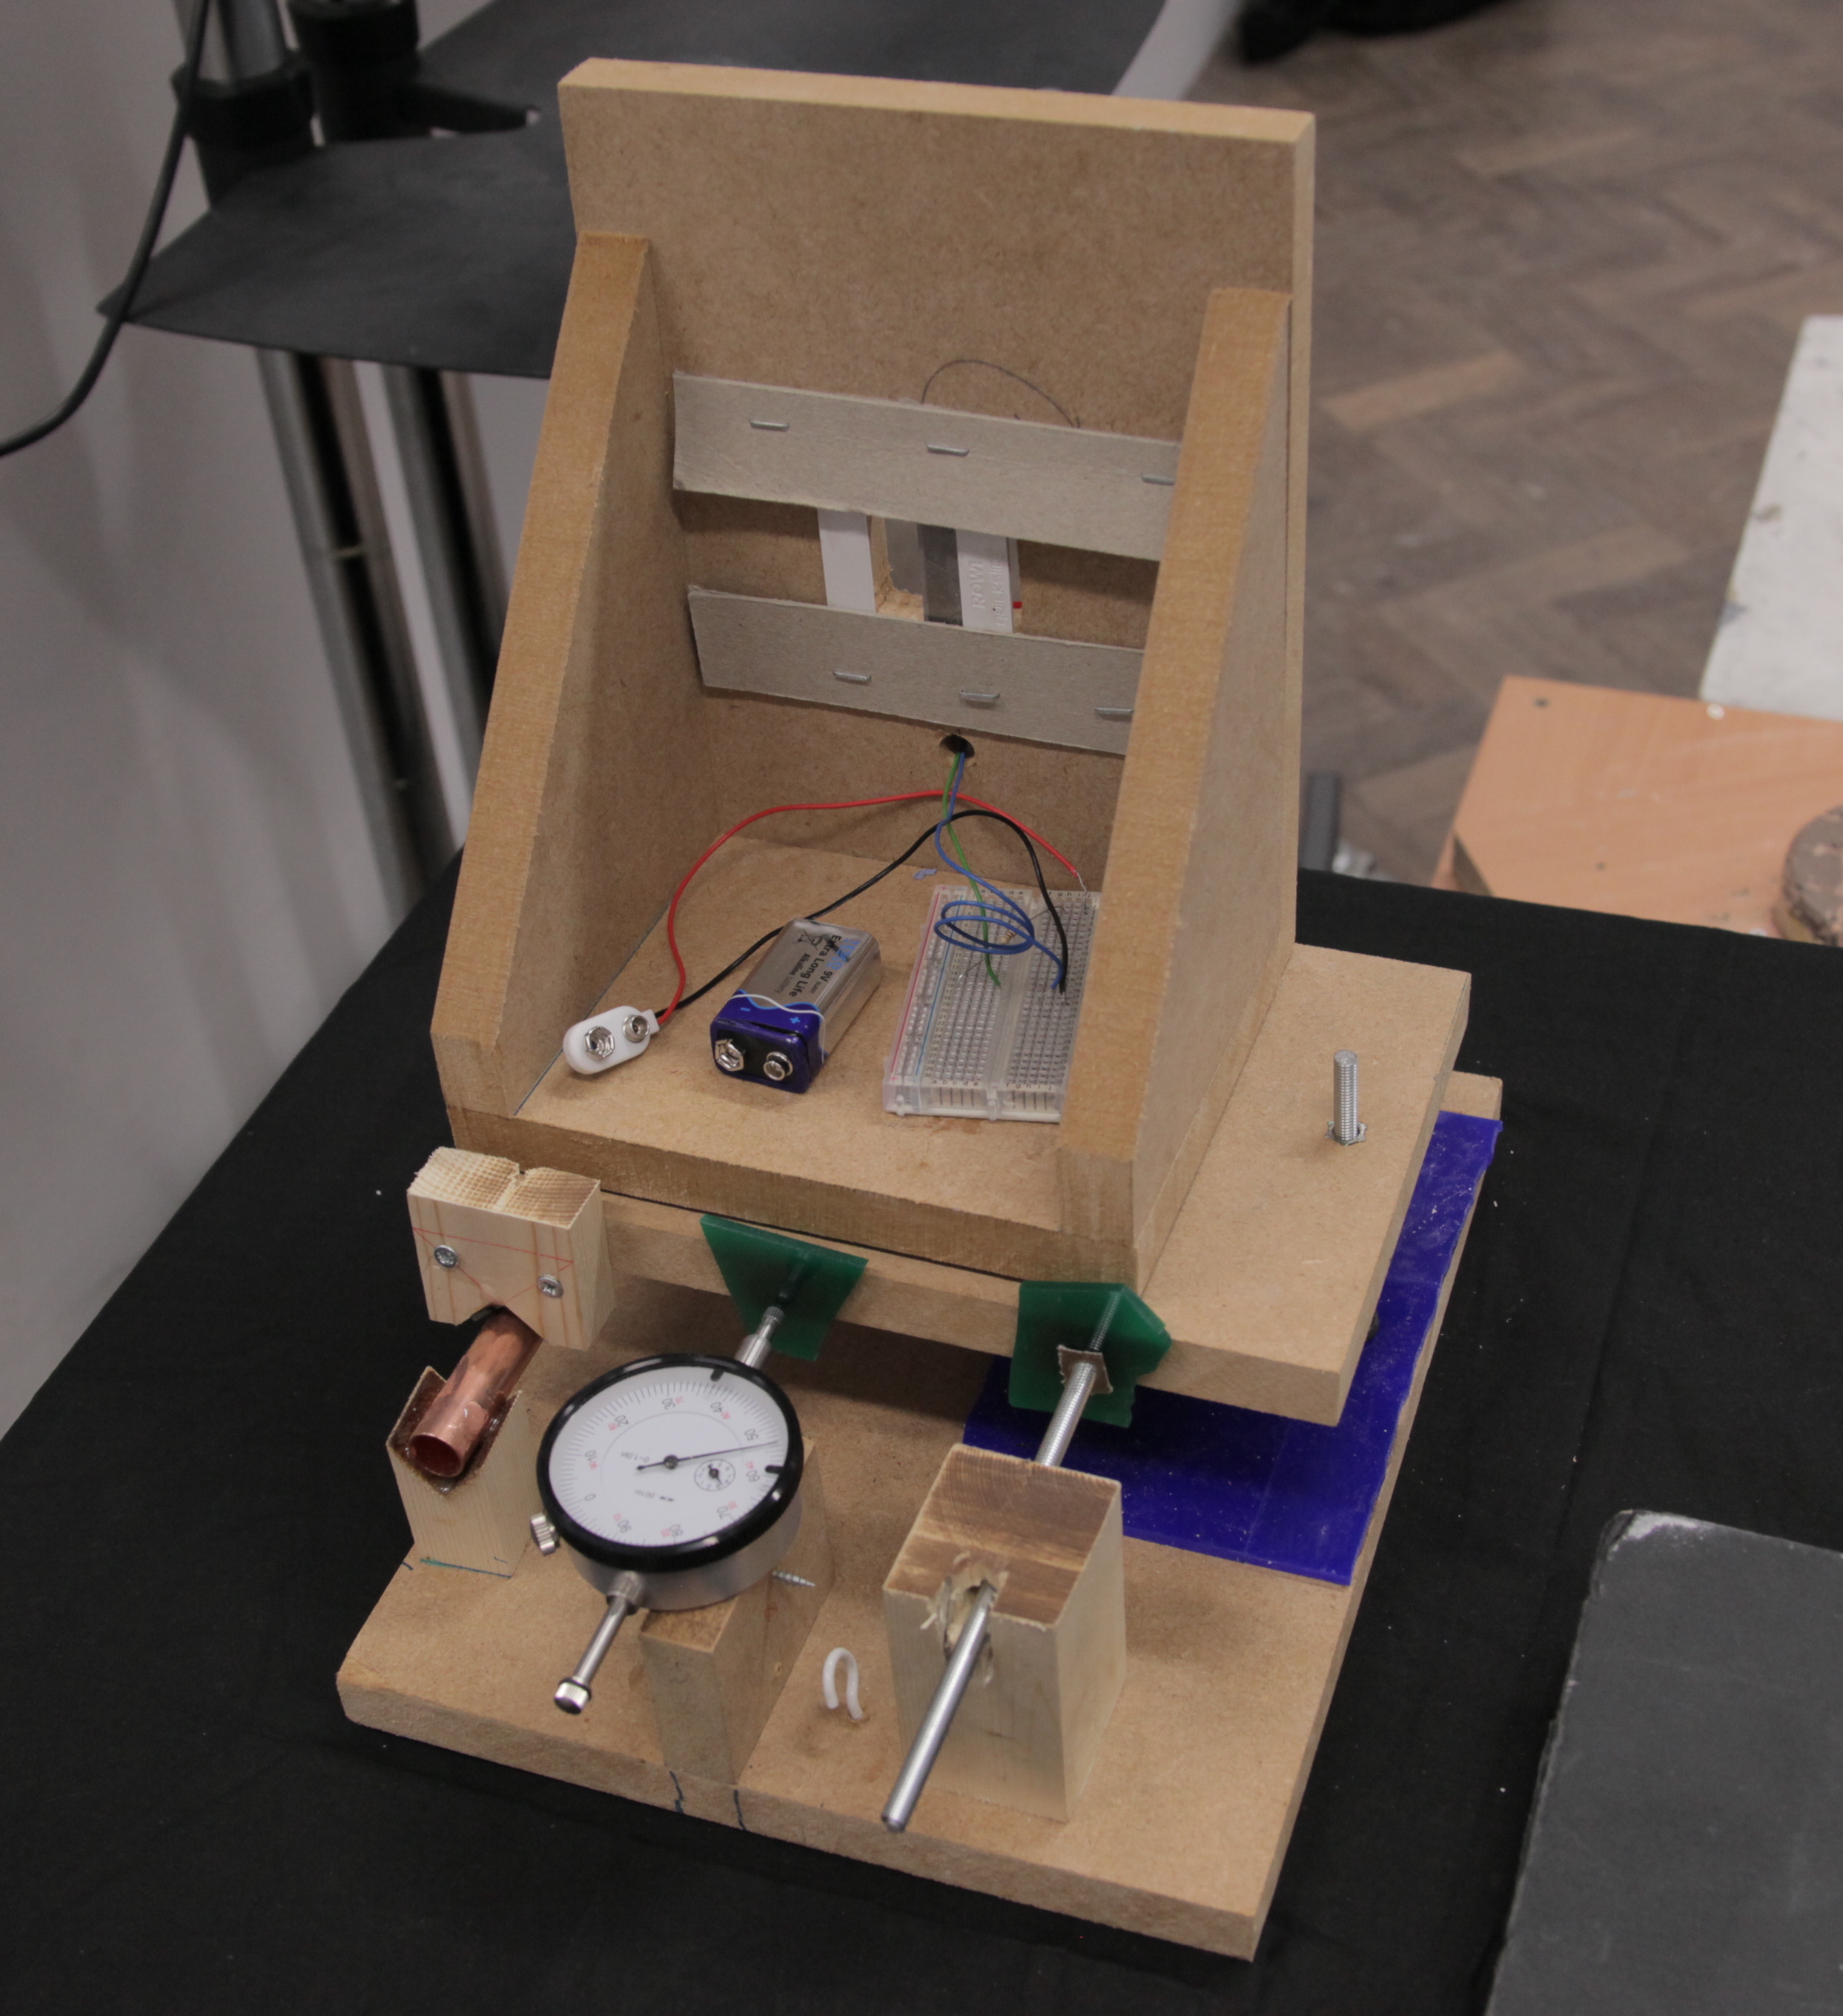
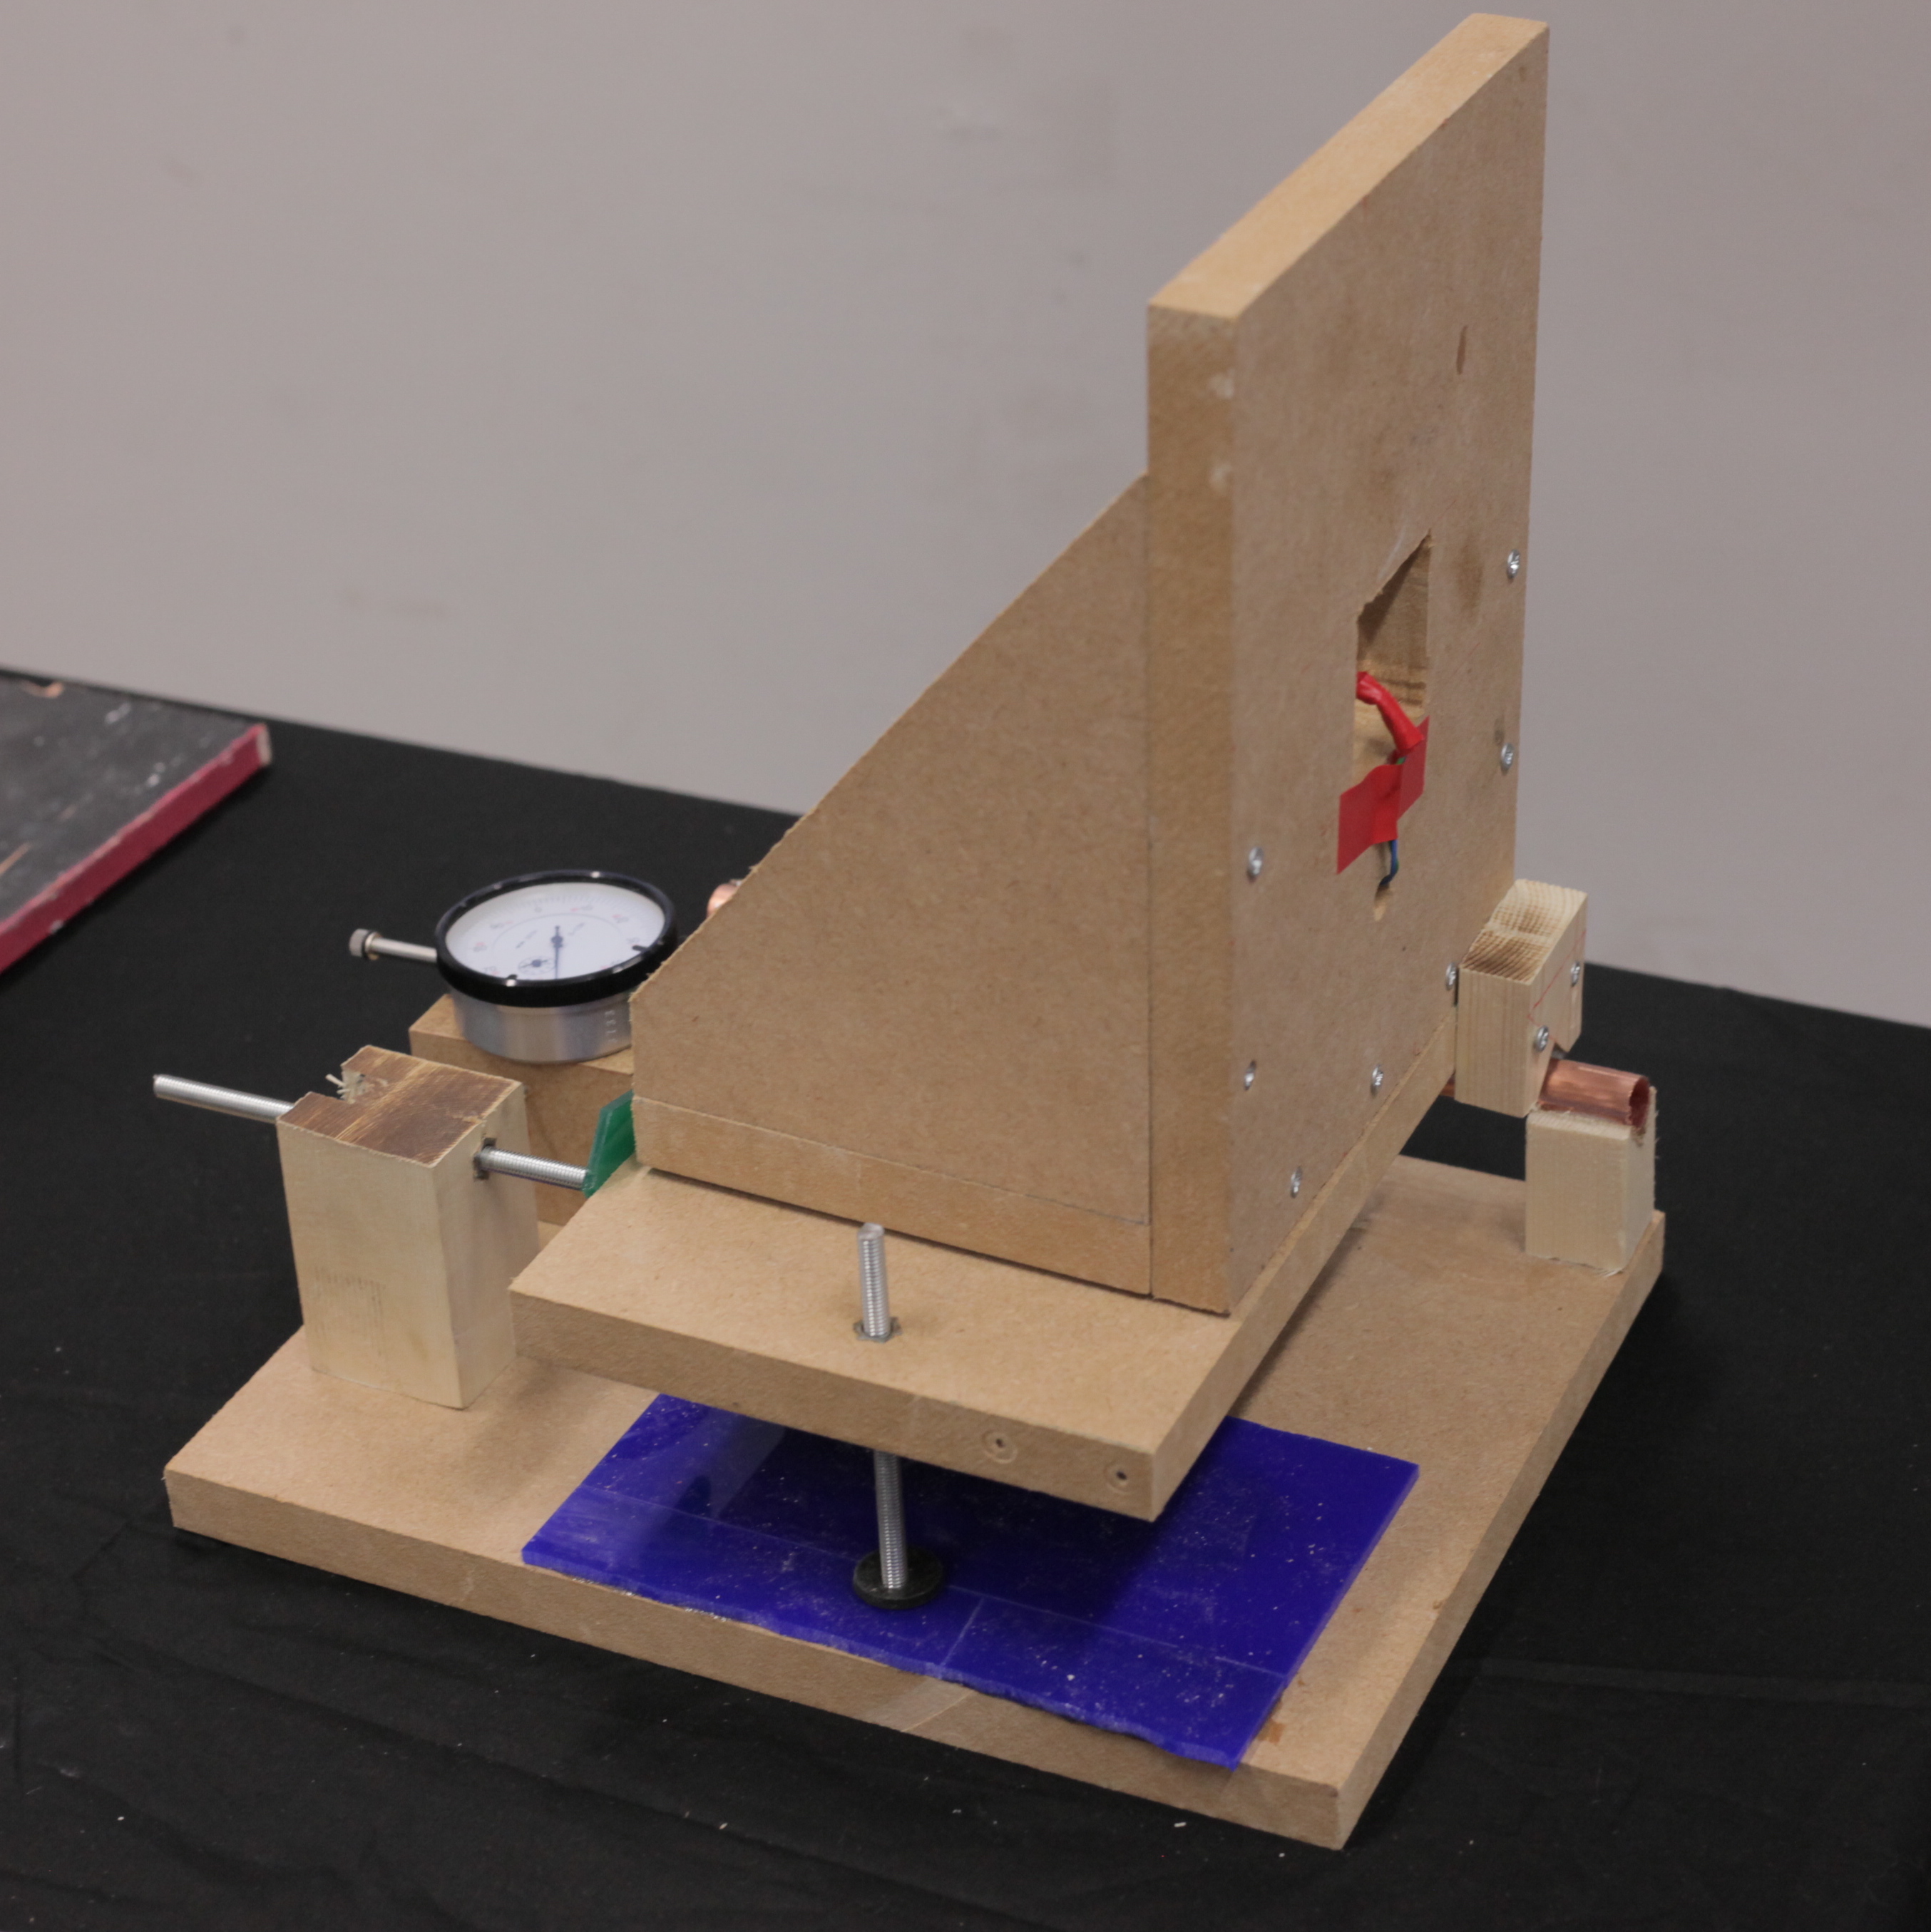
Following these plans I constructed my own Foucault tester to check the quality of the mirror’s surface.
These are the initial tests I got from my Schlieren optic system. Here you can see that the tester is 3.78m away from the mirror,at the mirror’s focal length. I demonstrate how, through the system, one can see the heat coming off a candle,human breath and body heat.